

First Steps
After you have created your account as described in the Registration & Workspace Setup guide, you will be directed to your Flexus workspace. Let’s walk through your first interactions with the platform.
Accessing Your Workspace
- Cloud users: Visit flexus.team and log in.
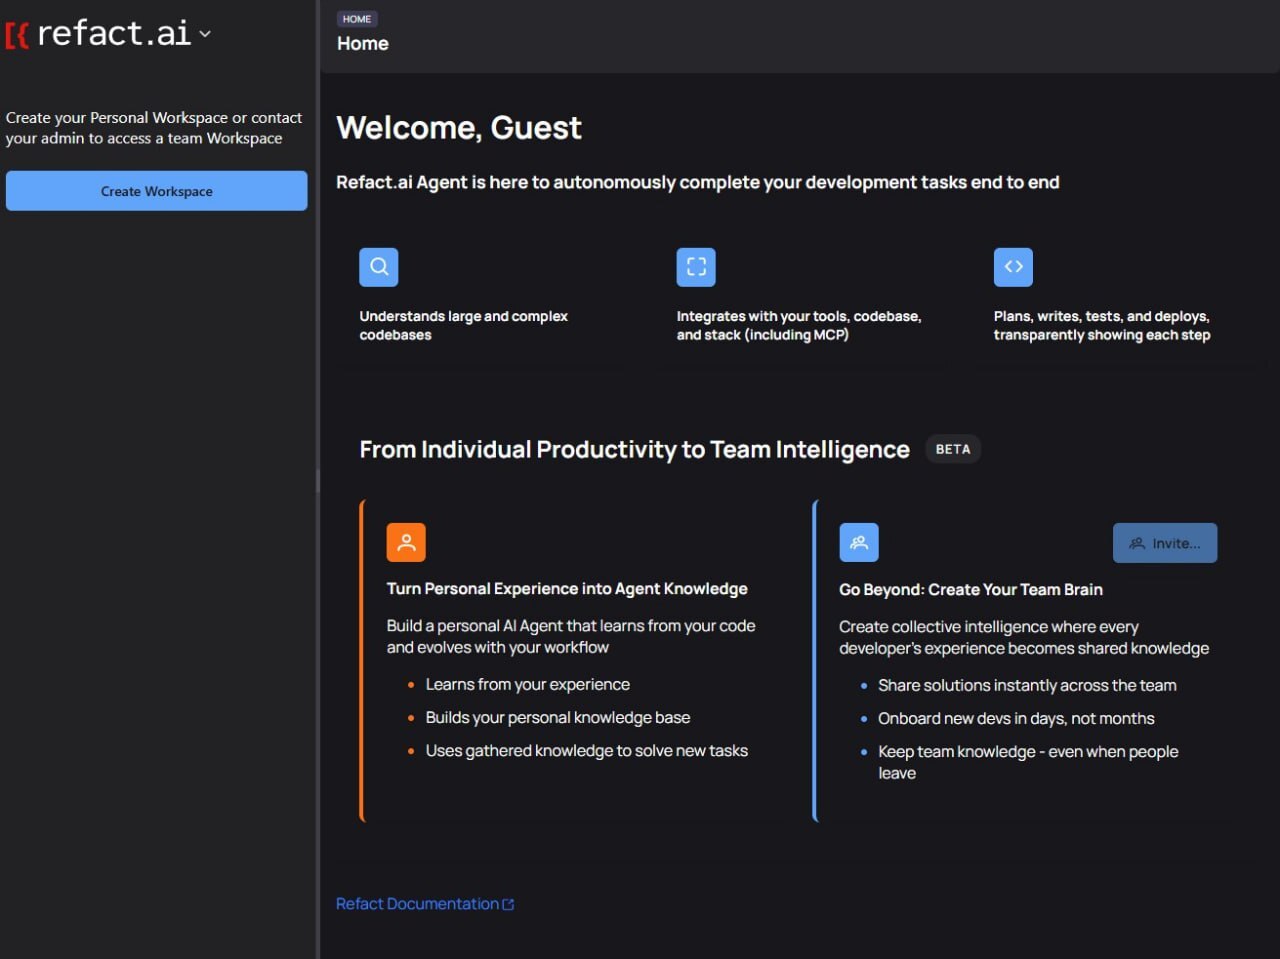 Admin user’s first login experience showing empty workspace dashboard
Your first login will be with the admin account created during setup. This account has full access to configure your workspace.
Workspace Overview
Upon first login, you’ll see the main dashboard. It provides a welcome message and an overview of what you can achieve with Flexus, guiding you to explore individual and team features.
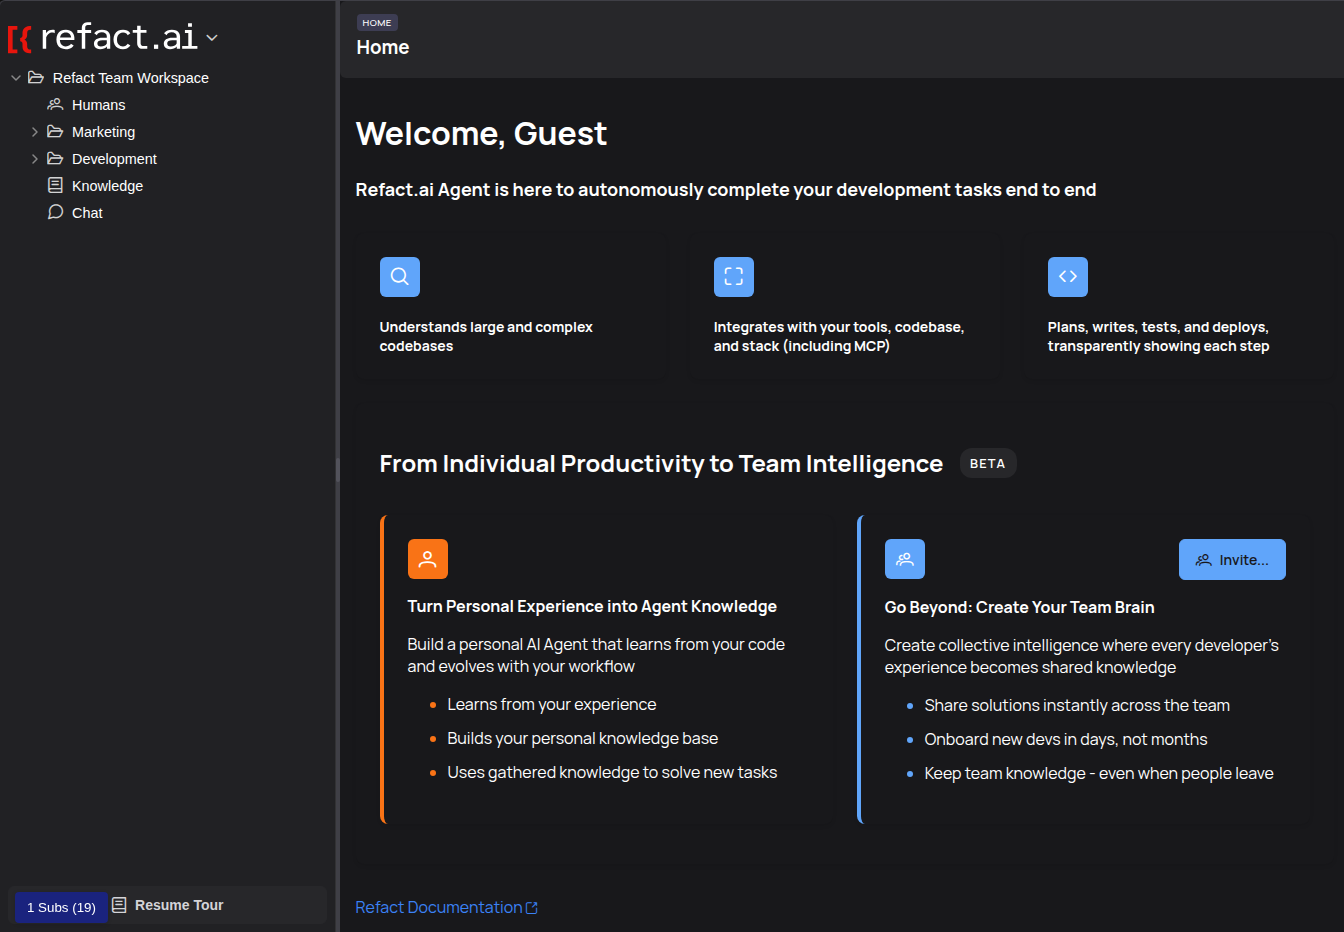 The initial dashboard shown to new users.
Navigation Elements
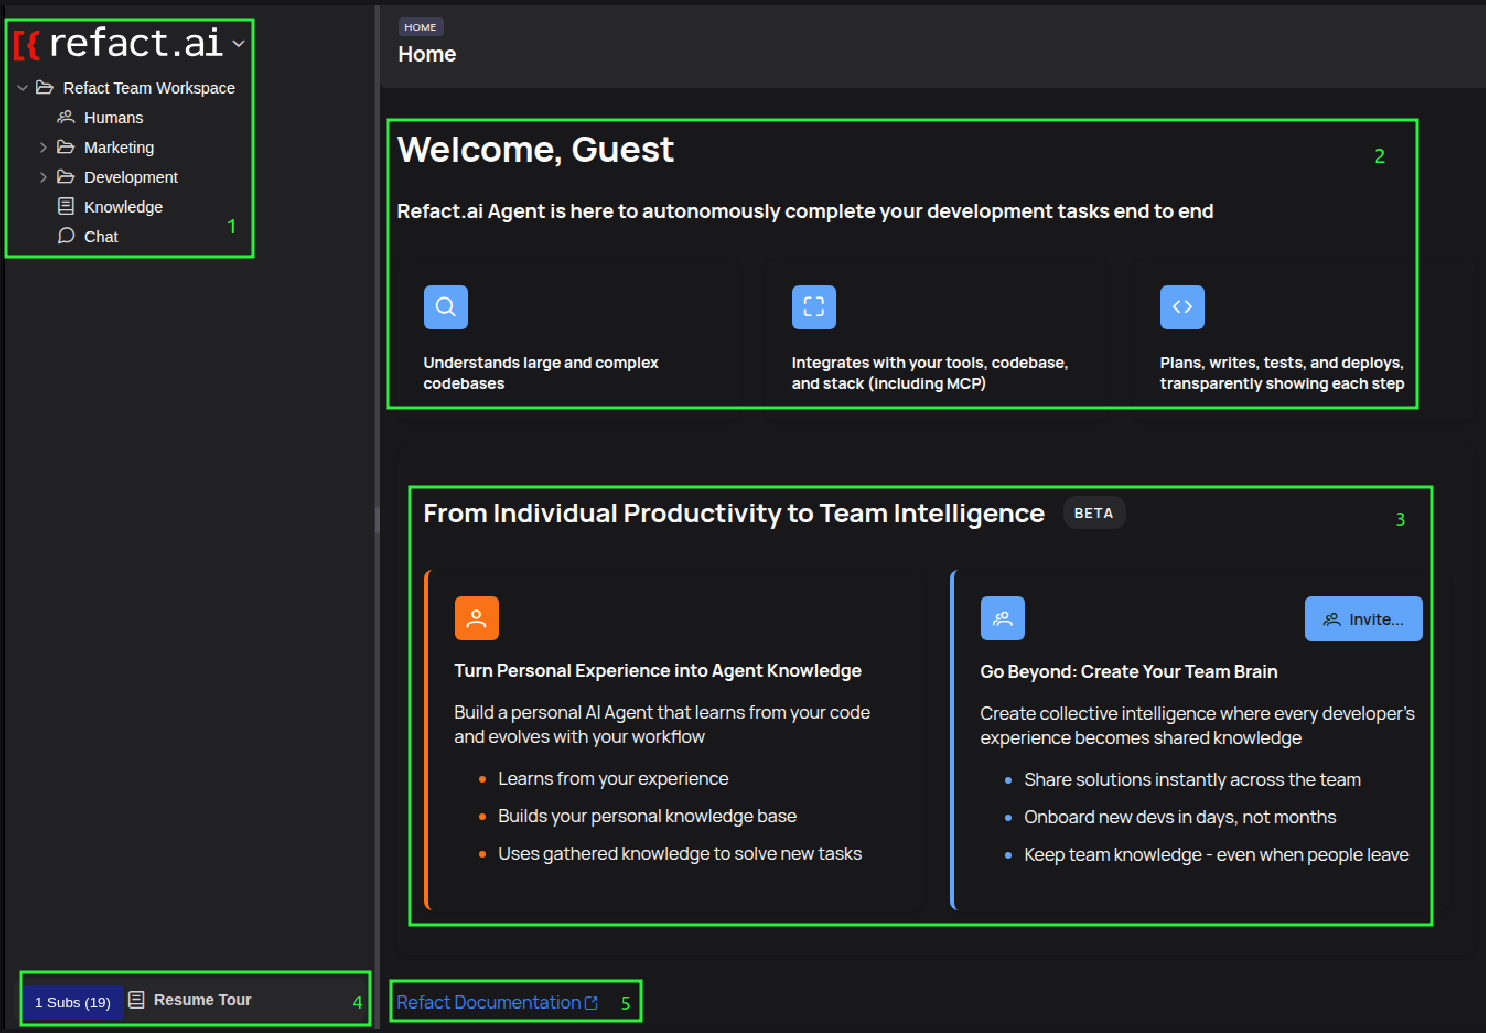 The main interface is divided into several key areas.
The main areas of the interface are:
- Sidebar: Provides primary navigation to different sections of your workspace like Humans, Marketing, Development, Knowledge, and Chat.
- Header & Welcome: Displays a welcome message and provides a high-level overview of Flexus’s capabilities.
- Main Content Area: This is where the primary content is displayed. In this case, it shows options for individual productivity and team intelligence.
- Tour & Subscription: Contains a button to resume a tour of the interface and shows your current subscription status.
- Documentation Link: A quick link to access this documentation.
Creating Your First Group
Groups are essential for organizing your work. Let’s create one.
- In the sidebar, right-click on your Workspace name (e.g., “Refact Team Workspace”).
- Select Add Group from the context menu.
- Enter a name for your group, like “Development Team”, and click Add.
That’s it! Your new group will appear in the sidebar.
We’ve just covered the basics. To learn more about organizing, renaming, and deleting groups, check out our detailed guide on Managing Groups.
Inviting Your First Team Members
Managing Team Members
Flexus provides a straightforward way to manage who has access to your groups and what level of permissions they have.
Inviting New Members
You can invite new members to any group where you have Invite permissions.
- Open the Share Dialog: Select a group in the sidebar, navigate to the
Humanstab, and click theInviteorSharebutton. - Enter User Emails: In the dialog box, you can paste one or more email addresses. You can invite people who are not yet registered; they will receive an email prompting them to create an account.
- Assign Initial Role: Select the initial role you want to grant to the new members from the dropdown.
- Send Invitations: Click Confirm. Each user will receive an email with an invitation link.
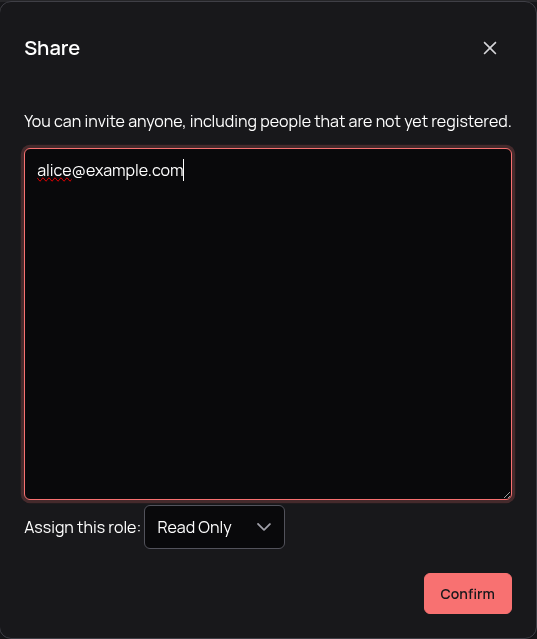 The dialog where you can input emails and assign an initial role.
The invitation link sent to users is valid for 7 days. If a user doesn’t accept the invitation within this period, you will need to send a new one.
Managing Roles
Once users have accepted their invitations, you can see them in the Humans list for that group. From here, you can easily manage their roles.
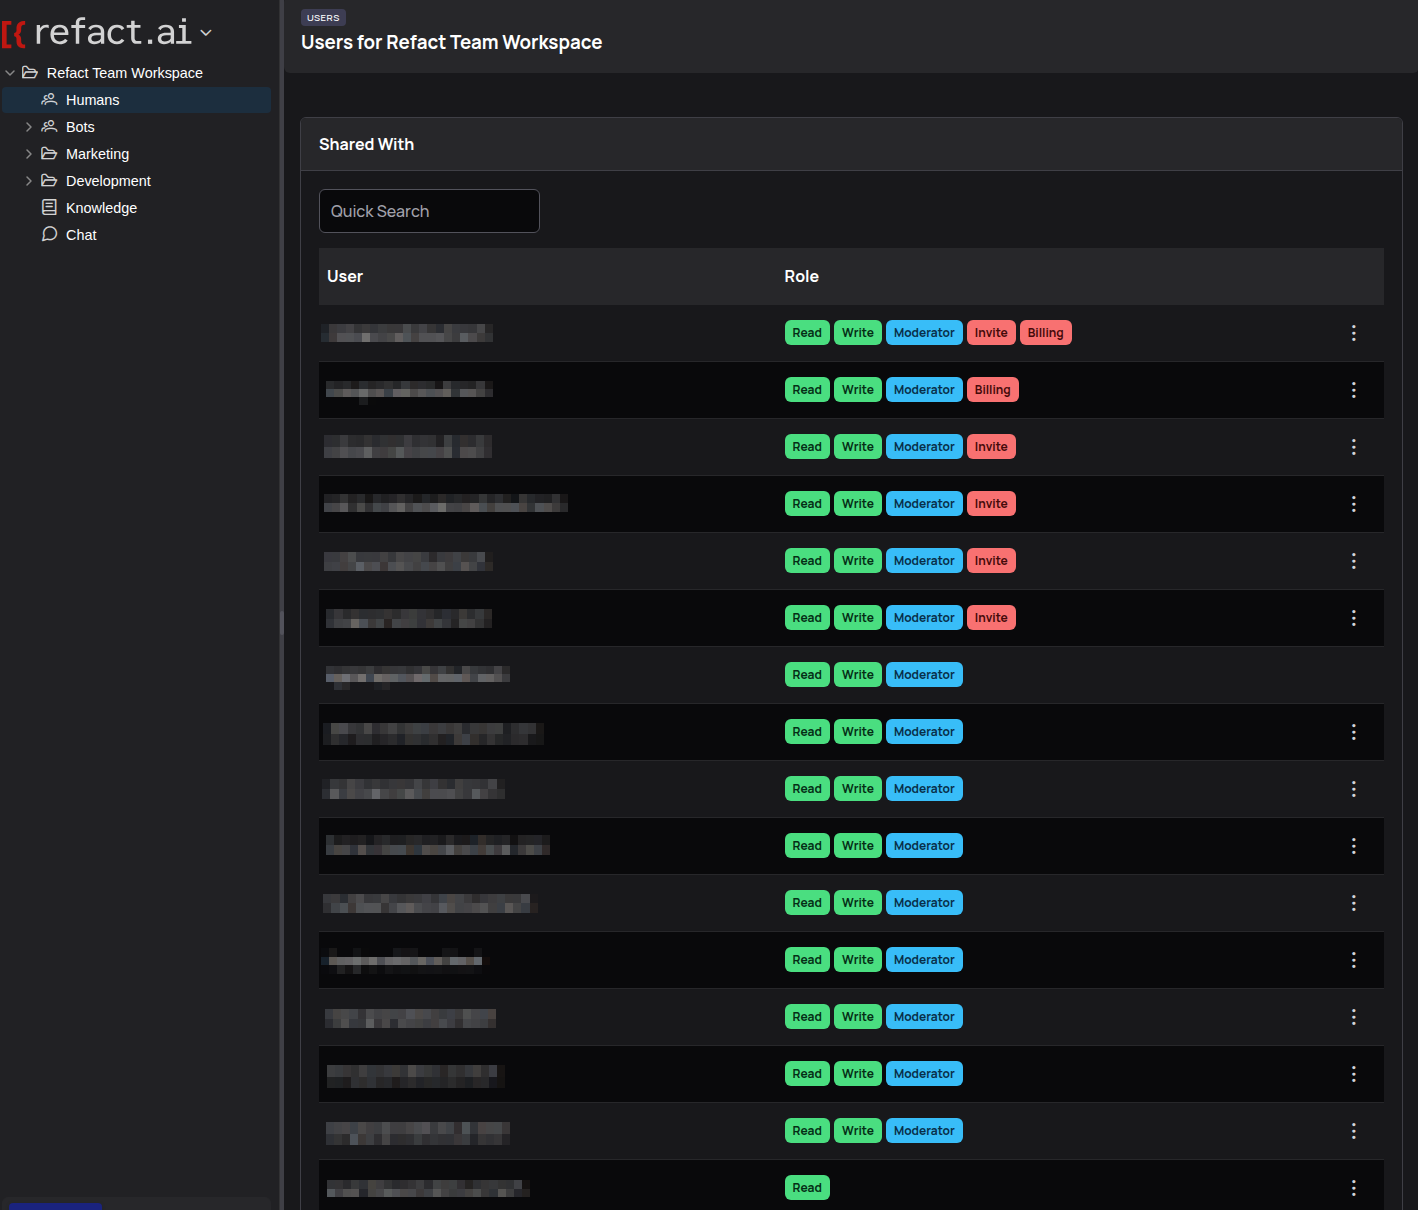 The user management screen displays a list of all members in the group and their assigned roles as colorful tags.
- User List: Shows all users who have access to the selected resource.
- Role Tags: User permissions are clearly displayed as colored tags next to each user. The available roles are:
Read: Can view content within the group.Write: Can read and modify content.Moderator: Can manage content and members (excluding billing).Invite: Can invite other users to the group.Billing: Can manage billing and subscription settings for the workspace.
- Changing Roles: To change a user’s permissions, simply click on their role tags to open the role management menu.
Inviting Multiple Users
You can easily invite multiple people at once, including those who are not yet registered on the platform.
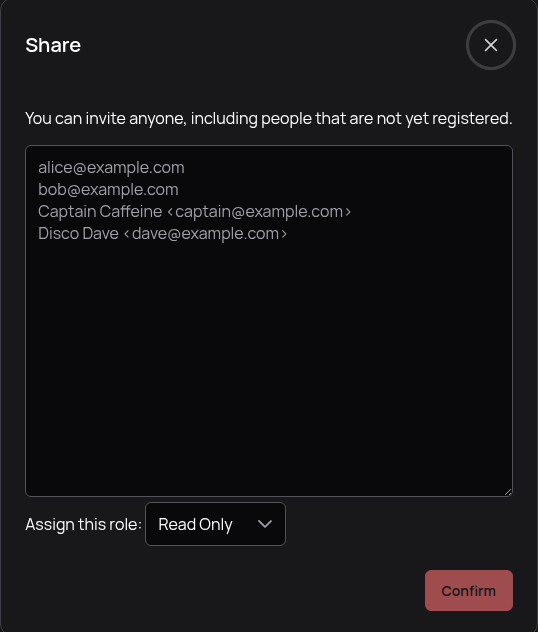 The Share dialog allows you to paste a list of users to invite them simultaneously.
- Open the Share Dialog: Navigate to the group or workspace you want to share and find the “Share” or “Invite” option.
- Enter User Information: In the text box, you can enter a list of users. Each user should be on a new line.
- Supported Formats: You can use two formats for entering users:
- Just the email address:
bob@example.com - A name and an email address:
Disco Dave <dave@example.com>
- Just the email address:
- Assign a Role: Use the dropdown menu below the text box to assign an initial role to all the users you are inviting (e.g.,
Read Only). - Confirm: Click the Confirm button to send out the invitations.
User Onboarding Flow
When users accept invitations:
- Account Creation: New users create accounts via invitation link
- Profile Setup: Basic profile information and preferences
- Group Assignment: Automatic assignment to specified groups
- Welcome Tour: Optional guided tour of key features
- First Tasks: Suggested initial actions to get started
Understanding the Interface
Sidebar Navigation
Main Sections
- Dashboard: Overview and activity
- Tasks: Kanban boards and task lists
- Bots: Automation management
- Groups: Team and permission management
- Settings: Workspace configuration
Collapsible Sections
- Each section can be collapsed to save space
- Recently used items appear at the top
- Custom shortcuts can be added
Next Steps
Congratulations! Your Flexus workspace is now set up with:
-
✅ Your first group created
-
✅ Team members invited
-
✅ Interface navigation understood
Immediate Next Steps
- Wait for Team Members: Monitor invitation responses
- Test Your Bot: Verify welcome bot works correctly
- Add More Tasks: Populate your Kanban board
- Explore Integrations: Connect external tools
- Configure Notifications: Set up email and in-app alerts
Advanced Configuration
- Set up MCP integrations for AI-powered features
- Configure custom bot development for advanced automation
- Set up monitoring and logging for system health
- Explore marketplace features (coming soon in future releases)
You’re now ready to dive deeper into Flexus! Each team member who joins will go through the welcome bot flow you’ve created.
Questions? Use the Ask Karen feature in the bottom-right corner or check our FAQ section.